
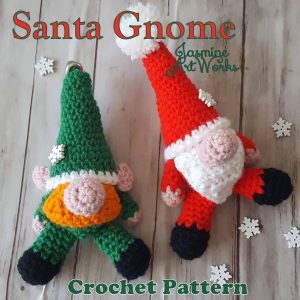
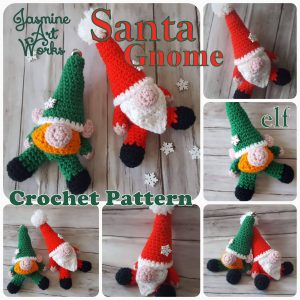
With the Holidays right around the corner I’ve been itching to create something cute and super easy, and fast. I wanted a simple gift item made with very little materials that makes a huge impact. I was toying around with making a cute Santa and googled a few pictures and found a silly gnome-like Santa clip art and thought “this has got to me made in yarn”
So the little red jolly gnome came to life super quick… so quick that I had to make another one in green.. this one however had to be an elf! With some adorable buttons I ordered a while back on Amazon and a few jingle bells this set are too perfect.
I was thinking they’d make great little stocking watchers.. or adorable Coffee cup fillers.. you know when you put some cocoa packets in the holiday cup with a note for that person you forgot on your list who stops by?
Or maybe strap him to the top of the perfect gift as wrapping decor. Standing at only about 8 inches tall he could be the adorable ornament on your wacky Christmas tree… you know you wanna make a ton of these for your tree!

The little Gnome in the Cup, stocking, tree ornament or present topper is gonna offer some special giggles and perhaps be apart of your Christmas Holidays for years to come. Pattern is here for free or you can get a printable ad free verson here:
Here’s How ya make him…
Materials:
Size 4 worsted weight yarn. White, black and Red and skin tone (I used RedHeart white, black and red, big twist light rose)
Fiber fill
4 mm hook, Needle/Scissors
Optional: Snowflake Button, Jingle Bells
Terms:
Back Loop Only – BLO
Stitch – ST
Chain – CH
Single Crochet – SC
Double Crochet – DC
Half Double Crochet – HDC
Slip Stitch – SL ST
Single Crochet 2 stitches together – Sc2tog
(An invisible decrease stitch makes these look nice and smooth)
Between * * repeat this many additional times “x”
End of row (Parenthesis) total number of stitches in row
Magic Circle – MC
Great tutorial for MC: https://www.youtube.com/watch?v=p298HxgsO1s
Note: when changing colors work ends into stitches as you go along. This allows for less end weaving at the end of project.
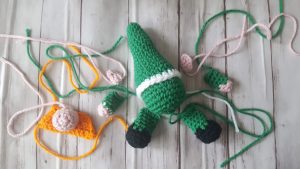
Hat/Body:
With Red/Green. Made all one piece.
1 – sc 6 in mc. Pull tight. (6)
2 – *2sc, sc* repeat 2x (9)
3-4 – sc all the way around (9)
5 – *2 sc, 1 sc, 1 sc* repeat 2x (12)
6-9 – sc all the way around (12)
10 – *2 sc, 1 sc next 3* repeat 2x (15)
11 – sc all the way around (15)
12 – *2 sc , sc next 4* repeat 2x (18)
13 – sc all the way around (18)
14 – *2 sc, sc, sc* repeat 5x (24)
15 – sc all the way around (24)
16 – HDC all the way around (24)
Change color to white
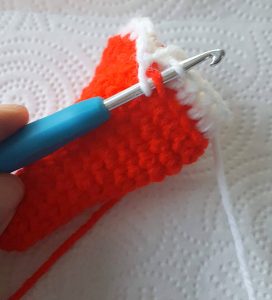
17 – HDC BLO all the way around (24)
18 – Put hook in front both front loops of tows 16 and 17, hdc all the way around, sl st into row 16 last st.
Change color back to red/green
19 – sc all the way around in 3rd loop of previous rows hdc stitches (24)
20-22 – sc all the way around (24)
23 – *sc next 4, sc2tog* repeat 3x (20)
24 – *sc next 3, sc2tog* repeat 3x (16) Stuff with fiber fill.
25 – *sc next 2, sc2tog* repeat 3x (12)
26 – *sc2tog* repeat until closed
Stuff with fiber fill, tie off and Weave in ends
Hands/Arms: Make 2
With Skin tone
1 – 6 sc in mc, pull tight
2 – sc all the way around (6)
Change color to red/green
3-5 Sc all the way around (6)
Pinch flat and slip stitch across the top arm closed. Tie off leave length for sewing to either side of body under hat.

Feet Legs: Make 2
With Black
1 – sc 6 in mc. Pull tight. (6)
2 – 2sc in each stitch around (12)
3 – sc sc all the way around BLO (12)
4 – sc all the way around (12)
Change color to Red/Green
5 – sc, sc, sc2tog (9)
6-9 – sc all the way around (9)
Stuff with fiber fill. Pinch flat and slip stitch across the top of leg closed. Tie off, leave length for sewing under body.
Beard:
With white Chain 13
1 – HDC in Second chain on the hook, hdc next 11, ch1 turn (12)
2 – hdc2tog, hdc next 8, hdc2tog, ch 1, turn (10)
3 – hdc2tog, hdc next 6, hdc2tog, ch 1, turn (8)
4 – hdc2tog, hdc next 4, hdc2tog, ch 1, turn (6)
5 – hdc across (6)
6 – hdc2tog, hdc next 2, hdc2tog, ch 1, turn (4)
7 – hdc2tog, hdc2tog, ch 1, turn (2)
8 – hdc2tog, ch1 (1)
sc all the way around the triangle. Tie off and weave in ends.
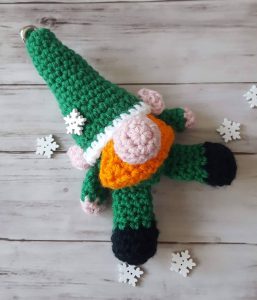
Sew along row 1 to body just under white of hat.
For Elf Option just to beard rows 1-3 in orange and sew row 3 to body just under white of hat. (opposite side from white beard)
Nose: With skin colored
1 – Sc 6 in mc pull tight
2 – 2sc in each st around (12)
3-4 sc all the way around. Tie off leave length for seeing over beard on face.
Ears for Elf:
Right – sc, sc, ch 5, sc, sl st into mc pull tight
Left – sc, ch5, sc, sc, sl st in mc pull tight
Finish with a small pom on top of hat or jingle bell. Add a snowflake button for an added touch.
I hope you enjoy these little guys as much I do. Feel free to comment with questions and/or share with your friends 🙂
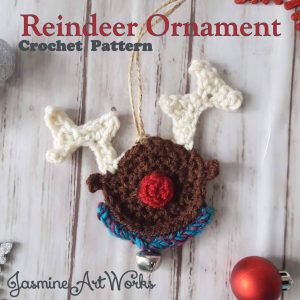
Want more Holiday Crochet?! Check out the Christmas tree! And Rudolf Ornaments!

Leave a Reply