
My daughter is all girl. Loves all things princess and all things Disney. Dress up time is a daily thing in our house. Ever since the newest Disney feature Moana came out she has begged me to make her her own Moana outfit. I had ideas, bought some material and put it off for as long as possible..I’m sure we all have those piles of craft projects awaiting our attention… right? Just Me? 🙂 but then October just creaped up on me and I knew it was time to put it together. Little did I know how easy it would be!
I’ve decided to document the process and share the templates for you all to sew and crochet your little princesses into Moana!
Supplies needed:
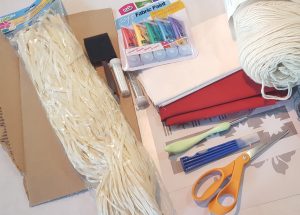
- About a yard of each burgandy/red, and off white cotton blend material. I got mine for walmart for less than $2 a yard.
- Some fabric paint, spongy brush. Also walmart paint.
- Some light off white worsted weight yarn. I used caron one pound stuff.
- Size I or 5.5 mm crochet hook.
- scissors and exacto knife.
- Pattern/templates printed on cardstock.
Optional: 7. toddler grass skirt, got mine from dollar tree in the summer. 8. glitter 9. cardboard to protect your surfaces from paint and knife. 9. Velcro. Just saw the stuff at dollar tree but I know you can get lots of it for cheap at joannes or any craft store.
Oh, I should probably say you’ll need a sewing machine too with thread.
This really isn’t an exact science. Have fun and Just go with it. You’ve got this!
Take the red material and measure your little one around the chest, cut out 2 rectangles of the red in a size that will fit around under her arms, leaving about an extra inch and a half on each end for fastening and seam allowance.
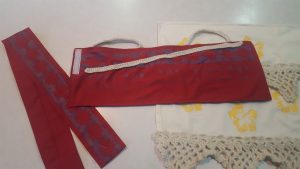
Also with the red cut a long narrow rectangle to make the sash.
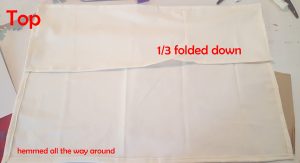
Take your white material and fold one side down into thirds. Wrap around your little one’s hips and measure for height and width around. with the top third folded down it should be about mid calf and it should overlap at least 2 inches around. Now, unfold the skirt and sew a hem around the entire white rectangle giving it a nice finished edge. Re fold the top third down and sew in place across the top of skirt.
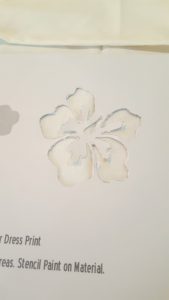
 Take your printed out on card stock templates found here:
Moana Flower Print Moana Print
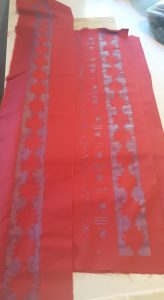
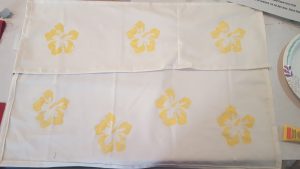
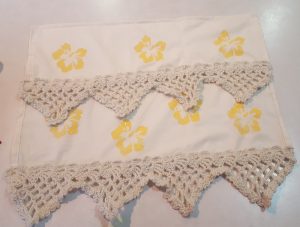
Then with your exacto knife cut out the dark spaces. Place template over materaial and dab fabic paint on lightly with brush. I mixed the red and blue together to make a dark purple color for the top and sash, then I used the yellow for the flowers on the skirt. While the paint is wet you can sprinkle on a little glitter for some flash. My daughter loves glitter! 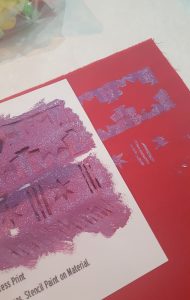
While the paint dries you’ll want to crochet the pretty little scallops for the skirt and straps and small detail on the shirt.
I used a half double crochet foundation stitch for the shirt detail and straps. Hdc foundation stitch video tutorial Each strap was about 30 stitches and the shirt detail was around 70. Like I said its not a science. Measure your little one as you go to make sure each piece is long enough.
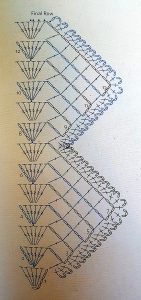
The skirt scallops I used the “Mesh Triangle Scallops” pattern. Easily found online.. but I’ll mention the steps here:
Terms: Ch – chain, Sl St – slip stitch, sc – single crochet, dc – double crochet, tr – triple crochet, sk – skip, sts – stitches, sp(s) – space(s)
*tip: this edging is crocheted sideways.
ch4,
- 5 tr in 4th ch from hook, turn
- sl st in sp between 3rd and 4th sts, ch 4 (counts as tr here and throughout), work 5 tr in same sp, ch2, sk 2 sts, dc in next st, turn.
- ch 5, (count as dc, ch2) sk next ch2 sp, dc innext dc, ch 2, sk 2 sts, 6 tr in sp before next st, turn.
- sl st in sp between 3rd and 4th sts, ch4, work 5 tr in same sp, ch2, sk 2 sts, dc in next dc, [ch 2, sk next ch-2 sps, dc in next st] twice, turn.
- ch 5 (counts as dc, ch2), sk next ch-2 sp, dc in next st, [ch 2, sk next ch-2 sp, dc in next st] twice, ch 2, sk 2 sts, 6 tr in sp before next st, turn.
- sl st in sp between 3rd and 4th sts, ch 4, work 5 tr in same sp, ch 2, sk 2 sts, dc in next st, [ch 2, sk next ch-2 spcs, dc in next st] 4 times, turn.
- ch 5 (counts as dc, ch2), sk next ch-2 sp, dc in next st, [ch 2, sk next ch-2 sp, dc in next st] 4 times, ch 2, sk 2 sts, 6 tr in sp before next st, turn.
Repeat steps 2-7 until you’ve got enough scallops to cover along the bottom of your skirt. Make it again for the top third fold as well. For my 4 year old I only needed 4 scallops for each level.
Final Row: Turn to work across zigzag edge, sl st in sp between 3rd and 4th sts, sl slt in each of the 3 sts, sl st in first ch-2 sp, (ch 3, sc) twice in same ch-2 sp, *(sc, ch 3, sc, ch 3, sc) in each ch-2 sp across the corner sp, ([sc, sch3]) 4 times, sc) in corner ch-5 sp, (sc, ch 3, sc, ch 3, sc) in each row-end st to valley; rep from * across. Fasten off, weave in ends. 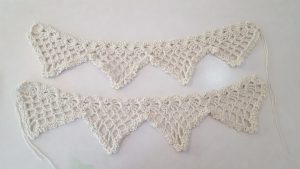
Sew on the crocheted pieces to the skirt and top. I used a simple zig zag stitch with white thread with my sewing machine to sew each piece on.
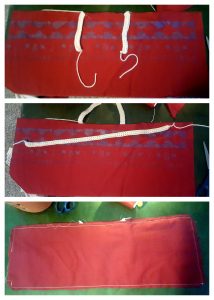
Then sew the top straps on the top edge of top. Then sew the lining (or second piece of red material). Sew all the way around except a small section to turn top right side out. Top stitch all the say around again closing hole and securing back of straps in place. This is a good time to add velcro to top and skirt. You can also hand sew on hook and eyes, buttons etc anything to keep back of top closed and skirt wrapped. Weave in any yarn strings left out and showing.
Fold red sash right sides together and sew down 1/4 inch seam down the edge, turn right sides out and fold in ends. Top stich all the way around with paint detail centered on top.
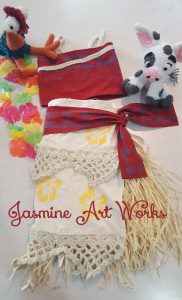
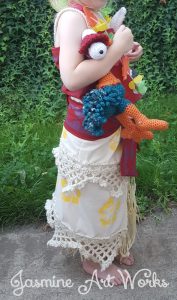
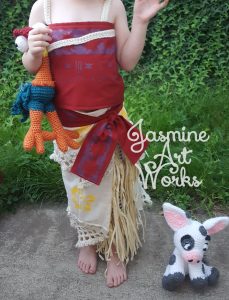
FInished!
Pictured with the Costume are my super fun characters from the movie, Hei Hei and Pua. Patterns for these found here! Pua Pig Crochet Pattern Hei Hei Crochet Pattern
Hope your little one enjoys their costume as much as mine does! Happy Crafting!
Leave a Reply